
Mastering the Azure PowerShell Module
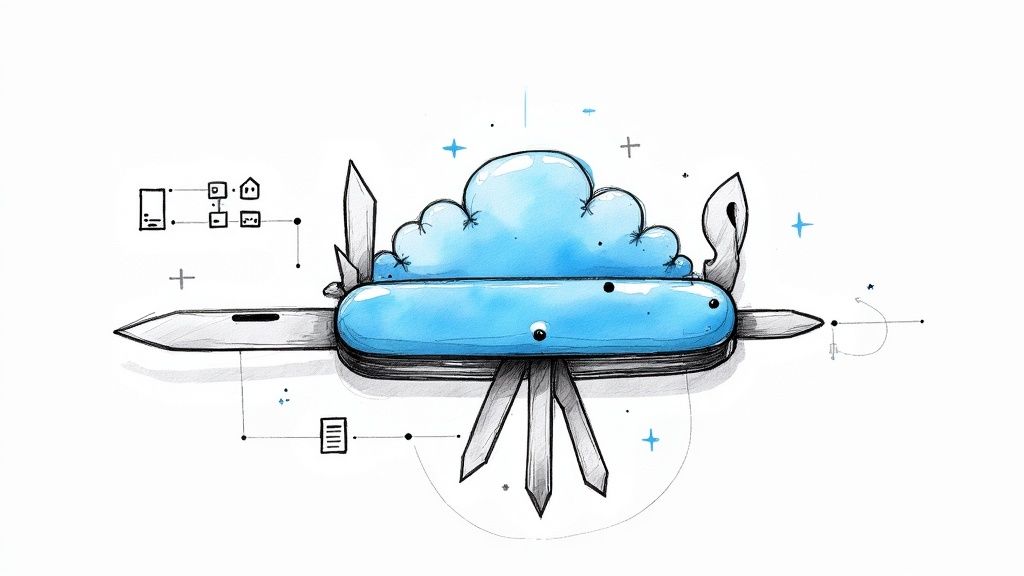
Imagine managing your entire Azure infrastructure without ever clicking a single button in the portal. That's the power the Azure PowerShell module puts right at your fingertips. This command-line tool isn't just an alternative to the graphical interface; for many tasks, it's a far better way to work, especially when it comes to automation, consistent deployments, and managing resources at scale.
Why the Azure PowerShell Module Is Your Automation Superpower
If you've ever found yourself clicking through the same sequence of screens in the Azure Portal day after day, you already feel the need for automation. The Azure PowerShell module, known simply as the 'Az' module, is the solution. It lets you turn those manual, error-prone processes into reliable scripts that you can run over and over again with perfect results.
Think of it this way: The Azure Portal is like driving a car manually. You're in complete control, handling the steering, pedals, and gears for every single action. The Az module, on the other hand, is like plugging a destination into a self-driving car. You just define the outcome—"create three virtual machines with these specs and connect them to this network"—and PowerShell figures out all the steps to get you there. It's not just faster; it also dramatically cuts down on the chance for human error.
The Shift from AzureRM to the Modern Az Module
The Azure PowerShell module marks a huge leap forward for cloud management. Microsoft introduced it as the modern, cross-platform successor to the older, Windows-only AzureRM module. Because the Az module is built on .NET Standard, it runs just as well on Windows, macOS, and Linux. For the best experience, you'll want to be on PowerShell 7.2 or higher. This move brought more secure, stable, and powerful commands for wrangling all your Azure resources. You can check out Microsoft's official documentation to see all the cross-platform benefits firsthand.
The real magic of scripting isn't just about speed; it's about consistency. A script guarantees that a complex environment is deployed the exact same way in development, testing, and production. It completely wipes out the classic "it worked on my machine" headache.
A quick comparison can help you decide when to use which tool for maximum efficiency.
Choosing Your Azure Management Tool
| Feature | Azure PowerShell Module (Az) | Azure Portal (GUI) |
|---|---|---|
| Best For | Automation, bulk operations, repeatable tasks | Visual exploration, one-off tasks, learning |
| Speed | Extremely fast for complex or large-scale tasks | Slower, requires manual clicks for each step |
| Consistency | High; scripts ensure identical deployments every time | Low; prone to human error and missed steps |
| Learning Curve | Steeper; requires learning commands and syntax | Gentle; intuitive and easy for beginners |
| Integration | Excellent for CI/CD pipelines and DevOps workflows | Limited; not designed for automated pipelines |
While the portal is great for discovery, once you know what you need to do, the command line is where the real work gets done efficiently.
Practical Applications and Benefits
The true value of the Azure PowerShell module really shines when you see it in action. Instead of manually clicking through blade after blade to configure a web application, you can run a single script to set everything up. This can include provisioning the core infrastructure, like an Azure App Service plan, and even deploying your code. If you're new to that, you can learn more about what Azure App Service is and see how it fits in.
This scripting power reaches every part of your Azure environment. Here are just a few key benefits:
- Scalability: Effortlessly manage hundreds or even thousands of resources using simple loops and logic. Trying to do that in the portal would be a nightmare.
- Audit and Reporting: Quickly generate detailed reports on resource configurations, costs, or security compliance by querying your entire Azure subscription with just a few lines of code.
- Integration: Seamlessly plug Azure management into your CI/CD pipelines. This opens the door to true Infrastructure as Code (IaC) and lets you automate your entire delivery process from start to finish.
Your First Steps to Installation and Setup

Alright, let's get our hands dirty and set up the Azure PowerShell module. This is where the magic begins, and thankfully, getting started is pretty painless. Before you can start firing off commands to manage your Azure resources, we just need to make sure your local machine is ready to go. The good news? The setup is quick and really only requires a single command to get everything installed.
The one key thing you'll need is a modern version of PowerShell. For the best experience across Windows, macOS, and Linux, Microsoft recommends using PowerShell 7.2 or higher. This guarantees you have all the latest features, security patches, and cmdlet improvements needed for working with your cloud environment. If you're running an older version, this is a great excuse to upgrade.
Once your PowerShell environment is up to date, you can pull the Az module straight from the PowerShell Gallery, which is the official central hub for all things PowerShell.
Installing the Az Module
The installation process is refreshingly consistent, no matter what operating system you're on. The Az module itself is what we call a "rollup" module. Think of it as a master package—when you install it, it automatically pulls in all the individual modules for different Azure services, like Az.Compute for virtual machines and Az.Storage for your storage accounts.
To get the module installed just for your own user account, pop open a PowerShell terminal and run this command. This is the method I recommend for most people because it doesn't require administrator rights and keeps things tidy.
Install-Module -Name Az -Scope CurrentUser -Repository PSGallery -Force
This command reaches out to the PowerShell Gallery, grabs the latest version of the Azure PowerShell module, and installs it. The -Scope CurrentUser part is what tells it to install only for you, which helps prevent any conflicts with other users or system-wide configurations.
Pro Tip: If you're setting up a shared machine, like a build server or a jump box, you might need to install the module for everyone. To do that, just run PowerShell as an administrator and swap out the scope:
Install-Module -Name Az -Scope AllUsers ....
Verifying a Successful Installation
Once the installation finishes, you'll want to quickly check that everything worked. A simple verification step now can save you a headache later. The easiest way to do this is to ask PowerShell for the module's version details.
Just run this command in your terminal:
Get-InstalledModule -Name Az
If you see output showing the version number and other info about the Az module, you're golden. That's your confirmation that everything is installed correctly and you're ready to connect to your Azure account, which is our very next step.
Don't forget that keeping your Azure PowerShell module updated is just as critical as the initial install. Azure is constantly evolving, and module updates deliver support for new services, performance boosts, and important bug fixes. To update, simply run:
Update-Module -Name Az -Force
I make it a habit to run this every so often. With the module now installed and verified, you've got the foundational tool for automating just about anything in Azure.
2. Connecting to Azure: Your Secure Handshake
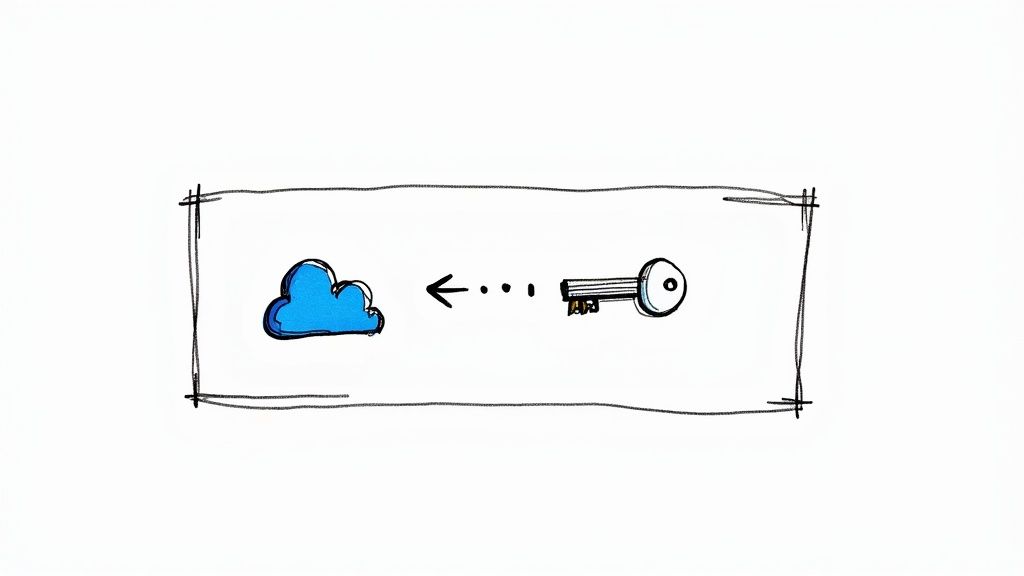
Alright, you've got the Azure PowerShell module installed. Now comes the important part: securely connecting to your Azure environment. This is the handshake that lets you start managing resources.
Think of it like having different keys for your office building. You have your personal keycard for day-to-day access, but you might give a temporary code to a contractor or a special key to an automated cleaning service. Each method has a specific purpose, and choosing the right one is crucial for both security and workflow.
For Your Daily Work: Interactive and Device Code Login
When you're at your own machine, getting connected is simple. Just pop open PowerShell and run Connect-AzAccount. This command will typically launch a browser window where you can sign in with your usual Azure credentials. It's the most common method for direct, hands-on work.
But what if you're on a server with no browser, like an SSH session? No problem. For these "headless" scenarios, Azure PowerShell has a slick solution.
Just run Connect-AzAccount -UseDeviceAuthentication. Instead of a browser, PowerShell will give you a short, unique code. You then grab your phone or laptop, visit the Microsoft device login page, and punch in that code. It securely authenticates your terminal session without you ever typing a password on the remote machine. Simple, fast, and secure.
For Automation: Service Principals
When it comes to automation, like a CI/CD pipeline deploying your app, you can't have a script stopping to ask for a password. This is exactly what Service Principals are for.
A Service Principal is essentially a non-human identity in Microsoft Entra ID (formerly Azure Active Directory). You create this "robot" account, give it only the permissions it needs to do its job, and then your scripts can use its credentials to log in. This follows the security best practice known as the principle of least privilege. With security being a top concern for over 70% of organizations in the cloud, this isn't just a good idea—it's essential.
You'll connect by providing the Service Principal's credentials, like its application ID and a secret or certificate.
Connecting using a Service Principal's credentials
$credential = Get-Credential
Connect-AzAccount -ServicePrincipal -Credential $credential -Tenant "YourTenantID"
This approach is the cornerstone of professional DevOps, enabling secure, unattended automation in tools like Azure DevOps, GitHub Actions, and Jenkins.
Why is this so important? By isolating automated tasks to a Service Principal, you contain your risk. If a script's credential is ever compromised, you can disable that one Service Principal instantly without affecting any user accounts. It's a fundamental part of building secure, enterprise-grade automation.
The Gold Standard: Managed Identities
For any code or script running inside Azure—on a Virtual Machine, in an Azure Function, or an App Service—there's an even better, more secure method: Managed Identities.
A Managed Identity is an identity that Azure creates and manages for you. When you enable it on a resource, that resource can securely connect to other Azure services without needing any credentials stored in your code. No secrets, no certificates, no passwords to manage or accidentally leak.
You'll encounter two flavors:
- System-assigned: An identity tied directly to a single Azure resource. If you delete the resource, its identity is deleted too.
- User-assigned: A standalone identity you create that can be assigned to one or more Azure resources. It has its own lifecycle, separate from any resource.
Connecting from a resource with a Managed Identity enabled is almost laughably simple.
On an Azure VM or other resource with a Managed Identity
Connect-AzAccount -Identity
That’s it. One command, no passwords. Azure handles the entire authentication flow securely behind the scenes. This is the most secure method available and should be your go-to choice for any automation running within the Azure ecosystem. It completely eliminates the headache of credential management.
Putting Core Cmdlets into Practice
Alright, you're connected to Azure. Now for the fun part: actually managing resources. Theory is one thing, but getting your hands dirty with real commands is where the Azure PowerShell module really starts to shine. We're going to skip the textbook-style lists and jump right into the kind of tasks you'd perform on a real project.
This hands-on approach is all about building muscle memory. By the time we're done here, you'll see how just a few core commands can be strung together to deploy and manage a simple but complete application environment.
The Foundation of Everything: Resource Groups
Before you can spin up a virtual machine, a database, or pretty much anything else in Azure, you need a home for it. In Azure, that home is a resource group.
Think of a resource group as a logical folder for all the components of a single application. It’s how you keep everything organized for management, billing, and security.
The cmdlet you'll use for this is simple, and you'll probably type it more than any other: New-AzResourceGroup. Let's create one now.
New-AzResourceGroup -Name "AZ204-Fast-RG" -Location "EastUS"
With that single line, you've just told Azure to create a brand-new resource group named "AZ204-Fast-RG" in the East US data center. Azure will respond with details confirming its creation, including a provisioning state of "Succeeded." This is the first step for almost every deployment you'll ever do.
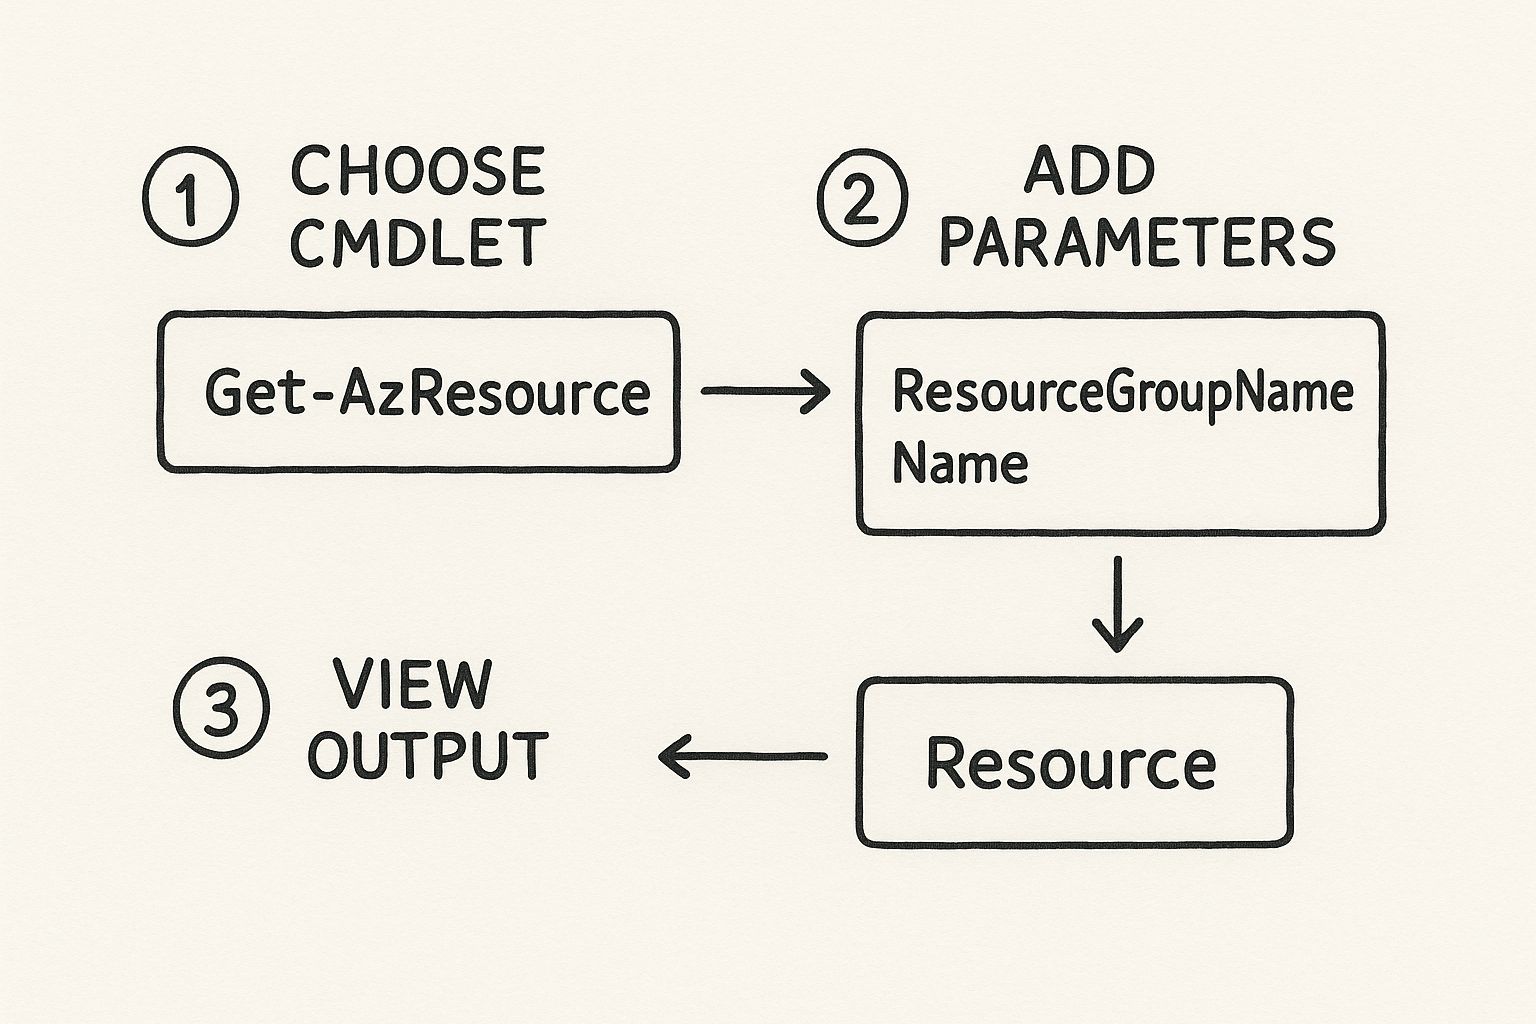
As this shows, the workflow is a simple loop: you pick a command, feed it the details it needs (parameters), and then check the results Azure sends back. It's a powerful and repeatable pattern.
Deploying and Controlling Virtual Machines
With our resource group ready, we can start adding resources to it. A virtual machine (VM) is one of the most common, so let's start there. While the New-AzVM cmdlet has a ton of options, PowerShell makes it surprisingly easy to create a basic server with just a few key details.
The cmdlet uses a configuration object to neatly bundle all the settings for the VM. This keeps your commands clean and readable instead of becoming one massive, unreadable line.
First, create a credential object to secure the VM's admin account
$cred = Get-Credential
Next, define the VM configuration using a series of piped commands
$vmConfig = New-AzVmConfig -VMName "myTestVM" -VMSize "Standard_B1s" | Set-AzVMOperatingSystem -Windows -ComputerName "myTestVM" -Credential $cred
| Set-AzVMSourceImage -PublisherName "MicrosoftWindowsServer" -Offer "WindowsServer" -Skus "2019-Datacenter" -Version "latest" `
| Add-AzVMNetworkInterface -Id $nic.Id # (Assumes a $nic object was created previously)
Finally, create the VM inside our resource group
New-AzVM -ResourceGroupName "AZ204-Fast-RG" -Location "EastUS" -VM $vmConfig
That script might look a bit long, but it’s incredibly powerful. It defines the VM's size, its name, the exact Windows Server image to use, and how it connects to the network. And just like that, you have a running server in Azure, created entirely from your terminal.
Of course, deploying a VM is just the beginning. The Azure PowerShell module gives you a full suite of commands to manage its entire lifecycle. You can easily start, stop, and restart VMs to perform maintenance or, more importantly, to save money.
Here are the essentials for day-to-day VM management:
Start-AzVM: Boots up a stopped virtual machine.Stop-AzVM: Shuts down a running VM and—crucially—deallocates its compute resources so you stop paying for them.Restart-AzVM: Performs a simple reboot of the virtual machine.
For instance, to shut down the VM we just created and stop the billing meter, you’d run this:
Stop-AzVM -ResourceGroupName "AZ204-Fast-RG" -Name "myTestVM" -Force
That -Force parameter is a handy trick for scripts, as it tells PowerShell not to wait for you to confirm the action.
A Quick Look at Essential Cmdlets
As you work with Azure, you'll start to notice patterns. Certain commands for creating, reading, updating, and deleting resources (often called CRUD operations) come up again and again. Here’s a quick reference table for some of the most common cmdlets you’ll use.
Essential Cmdlets for Everyday Tasks
| Resource Type | Common Cmdlet | Action |
|---|---|---|
| Resource Group | Get-AzResourceGroup |
Lists all resource groups in your subscription. |
| Virtual Machine | Get-AzVM |
Retrieves the details of a specific VM. |
| Storage Account | Get-AzStorageAccount |
Shows information about one or more storage accounts. |
| App Service | New-AzWebApp |
Creates a new web application. |
| SQL Database | Get-AzSqlDatabase |
Lists databases on a specific Azure SQL server. |
This table is just a starting point, but mastering these will give you a solid foundation for managing a wide variety of Azure services directly from the command line.
Provisioning a Storage Account
Almost every application needs to store data somewhere, whether it's user-uploaded files, log data, or static assets. For this, Azure Storage is the workhorse service. Using PowerShell to create a new storage account is incredibly straightforward.
The New-AzStorageAccount cmdlet is your tool for the job. You just need to provide a few key details.
A critical one is the name. Unlike most Azure resources, a storage account name must be globally unique across all of Azure. To handle this, we can just append a random number to our desired name.
Generate a unique name to avoid conflicts
$storageName = "az204faststorage" + (Get-Random)
Create the storage account
New-AzStorageAccount -ResourceGroupName "AZ204-Fast-RG" -Name $storageName
-Location "EastUS" -SkuName "Standard_LRS"
-Kind "StorageV2"
This command creates a general-purpose v2 storage account using Locally-Redundant Storage (LRS), which is a fantastic, cost-effective choice for many common scenarios.
By getting comfortable with just these three core cmdlets—New-AzResourceGroup, New-AzVM, and New-AzStorageAccount—you’ve already mastered the fundamental workflow for building out infrastructure in Azure. This pattern of creating a container, deploying compute, and adding storage is one you'll use constantly on your Azure journey.
Writing Smarter Scripts with Advanced Techniques
https://www.youtube.com/embed/MP_UR5iWfZQ
Taking the leap from firing off single commands to building real automation scripts is a game-changer. It’s like graduating from using a single power drill to designing and running a fully automated assembly line. In this section, we'll dive into the techniques that help you write scripts that are not just functional, but also safe, resilient, and efficient using the Azure PowerShell module.
Anyone can run a cmdlet. The real magic happens when you craft scripts that can handle unexpected errors, manage complex workflows, and even let you peek into the future to prevent costly mistakes. These are the skills that separate the pros from the amateurs.
Building Resilience with Error Handling
What happens when your script tries to create a resource that already exists? Or when it can't find a virtual machine it's supposed to modify? Without solid error handling, your script will simply crash, potentially leaving your Azure environment in a messy, half-configured state. This is exactly why try-catch blocks are so important.
Think of a try block as your optimistic plan: you're telling PowerShell, "Go ahead and attempt these actions, but keep an eye out for trouble." The catch block is your backup plan, your "in case of emergency, break glass" instructions. It lets you gracefully handle failures, log a useful error message, and decide whether to stop the script or carry on.
try {
# Attempt to create a resource group that might already exist
New-AzResourceGroup -Name "my-critical-rg" -Location "WestUS" -ErrorAction Stop
Write-Host "Resource group created successfully."
}
catch {
# If it fails, this block runs
Write-Warning "Resource group already exists or another error occurred."
Write-Host "Error details: $($_.Exception.Message)"
}
The secret sauce here is -ErrorAction Stop. You have to include it inside your try block. It forces PowerShell to treat even minor hiccups as show-stopping errors, which guarantees your catch block will actually run when something goes wrong.
Preventing Disasters with -WhatIf and -Confirm
Automation is incredibly powerful, but with great power comes the ability to make catastrophic mistakes at lightning speed. A single typo in a script could accidentally wipe out an entire production environment. Thankfully, the Azure PowerShell module gives us two indispensable safety parameters: -WhatIf and -Confirm.
The
-WhatIfparameter is your script's "simulation mode." It shows you exactly what a command would do—without actually doing it. This is your single most important safety net.
When you run Remove-AzResourceGroup -Name "my-critical-rg" -WhatIf, nothing gets deleted. Instead, PowerShell prints a message describing precisely what it would have done. This lets you double-check your work before you commit. The -Confirm switch goes a step further by pausing the script and asking for your explicit "yes" before executing a high-impact command.
Working with Long-Running Operations and Multiple Subscriptions
Some Azure tasks, like deploying a large database or a complex VM, aren't instant. They can take several minutes or longer to finish. If you run these commands normally, your PowerShell console will be locked up and unusable until they're done. The -AsJob parameter is the perfect solution, letting you run the task as a background job.
You can kick off a long process and get your terminal back immediately. Later, you can check on its progress with Get-Job and grab the results with Receive-Job. It’s essential for juggling multiple tasks at once.
Finally, most of us work across different environments—like dev, staging, and production—which often means switching between Azure subscriptions. You can easily list every subscription you have access to with Get-AzSubscription. To switch your active context, just run this:
Set-AzContext -Subscription "Your-Subscription-Name-Or-ID"
This command ensures all subsequent cmdlets are aimed at the right environment. It's a simple step that prevents you from accidentally making changes in production when you thought you were in a dev sandbox.
These advanced techniques elevate the Azure PowerShell module from a basic command-line tool into a robust platform for serious, enterprise-grade automation. When you're orchestrating complex workflows that involve multiple services, like queuing messages for background jobs, you can learn more by reading our guide on what Azure Service Bus is and how it helps services communicate without being tightly connected.
Understanding the Shift to Microsoft Graph
If you've been working with Azure for a while, you know the world of cloud administration is always evolving. A major change is happening right now in how we manage identity. For years, we juggled two different PowerShell modules, AzureAD and MSOnline, to handle tasks in what we now call Microsoft Entra ID. This often meant bouncing between different sets of commands, which was anything but efficient.
Microsoft's big-picture plan is to fix this. They're moving towards a single, unified endpoint for all Microsoft 365 services, and that endpoint is the Microsoft Graph API. Think of it as a central hub or a universal translator. It provides one consistent way to interact with everything from user accounts and groups to mailboxes and, of course, Azure resources.
Why This Shift Is Happening
This isn't just a spring cleaning of old tools; it’s a strategic move to build a more robust and future-proof platform. By funneling everything through Microsoft Graph, Microsoft gives developers and administrators a far more coherent and powerful toolkit. While the Az Azure PowerShell module is fantastic for managing Azure infrastructure—things like VMs, storage, and virtual networks—the modern standard for identity management is now the Microsoft Graph PowerShell SDK.
This shift was cemented with a significant announcement: the old Azure AD PowerShell modules (AzureAD, AzureAD-Preview, and MSOnline) are officially deprecated. This marks a full-scale migration to the Microsoft Graph PowerShell SDK, with a clear timeline for retiring the old modules completely. You can get all the specifics from Microsoft's official announcement on the module deprecation.
What does that mean in practical terms? Any of your scripts that still rely on Connect-MsolService or Connect-AzureAD are now on borrowed time. Migrating them isn't just a "good idea"—it's critical for keeping your automation running smoothly down the road.
Understanding this transition is essential for future-proofing your scripting and automation skills. Embracing the modern toolset—the Az module for Azure resources and the Microsoft Graph SDK for Entra ID—is the only way to ensure your scripts remain secure, supported, and ready for whatever comes next.
What This Means for Your Scripts
For those of us in the trenches, this change demands action. It's time to start looking at any scripts or automation that use the old modules and plan their migration.
- Audit Your Scripts: Your first job is to find everything that uses the old commands. Hunt down any scripts that call cmdlets from the MSOnline or AzureAD modules.
- Learn the New Syntax: The Microsoft Graph PowerShell SDK has a different command structure. For example, a familiar command like
Get-MsolUseris nowGet-MgUser. You'll need to get comfortable with these new cmdlets. - Plan Your Migration: Don't put this off. Start planning the move now to avoid a scramble when the old modules are finally turned off for good. A proactive approach will save you a lot of headaches.
By getting ahead of this change, you’re not just updating code; you're aligning your skills with Microsoft's modern management framework. In the long run, it will make your work more secure and a whole lot more efficient.
Frequently Asked Questions
Even the most seasoned developers have questions when working with a tool as robust as the Azure PowerShell module. Let's tackle some of the most common ones I hear, so you can solve problems quickly and get back to what matters—building great things on Azure.
What Is the Difference Between Az PowerShell and Azure CLI?
This is probably the most frequent question I get, and the honest answer is: it depends on you. Think of them as two different dialects for speaking to Azure. There's no single "best" choice, only what's best for your background and the way you work.
-
Azure PowerShell (Az module): If you live and breathe PowerShell, especially on a Windows machine, the Az module will feel like home. Its real magic is how it works with objects. You can seamlessly pipe the output of one command directly into another, letting you chain together sophisticated operations with ease.
-
Azure CLI: This tool is built for the cross-platform command line. If your background is in Linux or Bash scripting, you'll feel right at home with the CLI's syntax. The commands are generally shorter, more direct, and work with simple text strings instead of complex objects.
So, which one should you use? The one that feels most natural to you.
Key Takeaway: Go with Azure PowerShell if you love the power of object manipulation and are deep into the PowerShell ecosystem. Opt for Azure CLI if you prefer a simpler, text-based syntax and come from a Bash or Linux background.
Can I Use the Old AzureRM and New Az Modules Together?
Technically, you might be able to make it work, but I have to be blunt: don't do it. It's a recipe for headaches. Trying to run both the old AzureRM and the modern Az modules at the same time is a surefire way to cause command conflicts, making your scripts flaky and a nightmare to debug.
The best practice here is clear and simple: completely uninstall the AzureRM module before you install the Az module. While there's a handy compatibility command (Enable-AzureRmAlias) to help ease the transition, your long-term goal should always be to fully migrate your scripts to the modern Az cmdlet syntax.
How Do I Keep My Azure PowerShell Module Updated?
Keeping your Az module up-to-date is crucial. Azure evolves constantly, with new services and features rolling out all the time. Your module updates are your ticket to accessing them, not to mention getting the latest security patches and bug fixes.
Thankfully, the process is incredibly straightforward.
Just pop open an elevated PowerShell window and run this one command:
Update-Module -Name Az -Force
Using the -Force parameter is important. It tells PowerShell to update all the individual sub-modules that make up the complete Az module, ensuring everything is on the latest version. Make this a regular part of your routine. Staying current is a hallmark of a professional developer, and if certification is on your radar, take a look at our guide on how do I get Microsoft certified.
At AZ-204 Fast, we provide the focused tools you need to master Azure development. Our platform combines interactive flashcards, comprehensive cheat sheets, and dynamic practice exams to help you pass the AZ-204 exam efficiently. Get started today at https://az204fast.com.