
Azure Active Directory Integration Done Right
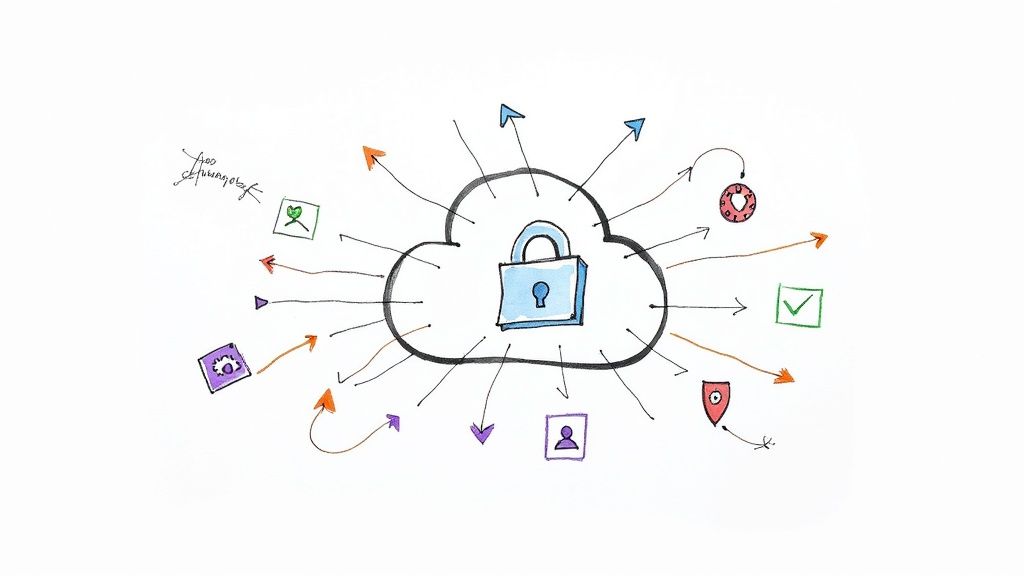
Integrating your application with Microsoft's cloud ecosystem all starts with a solid Azure Active Directory integration. This isn't just about adding a sign-in button; it's about connecting your app to a powerful, centralized identity provider. Getting this right is the foundation for secure user access, protected APIs, and streamlined management—essentials for any serious enterprise-level solution.
Why Azure AD Is More Than Just a Login Box
Before we even think about writing code, let’s get one thing straight: Azure Active Directory (now part of Microsoft Entra ID) is far more than a simple login screen. I’ve seen developers treat it as just another utility, but that misses the huge strategic value it brings to the table for everyone involved—from the dev team to IT admins and business leaders.
When you do an Azure Active Directory integration correctly, your application goes from being a standalone island to a trusted citizen within the Microsoft ecosystem. This is about building secure, scalable, and user-friendly software that’s ready for the demands of big business right out of the gate.
The Strategic Value of Centralized Identity
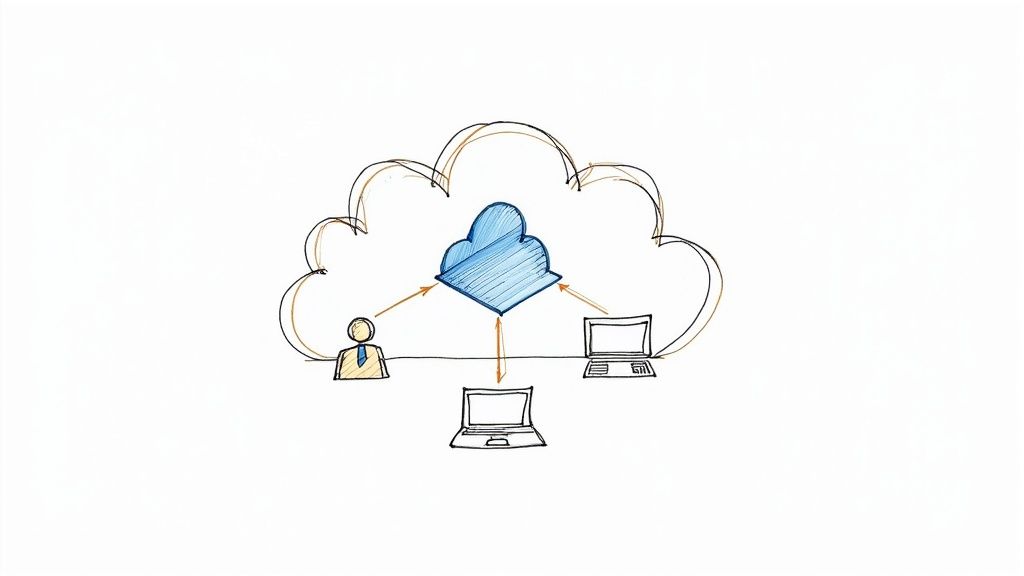
At its heart, Azure AD gives you a single, authoritative source for user identities. As a developer, this is a massive win. You can stop worrying about building and maintaining your own user management systems. No more custom password storage, reset workflows, or account security—you offload all that heavy lifting to a platform trusted by millions of organizations.
This shift to centralized identity pays off immediately:
- Enhanced Security Posture: You instantly inherit Microsoft's world-class security features. We're talking about sophisticated threat detection, identity protection, and advanced monitoring, all baked in.
- Simplified User Experience: Your users get the convenience of Single Sign-On (SSO). They can access your application using the same credentials they already use for Microsoft 365 and other services. It’s a simple change that dramatically reduces friction and password fatigue.
- Enterprise-Grade Compliance: Organizations can apply consistent security policies, like multi-factor authentication (MFA) and conditional access rules, across every connected app—including yours.
Azure AD is a cornerstone of Microsoft's cloud, acting as the identity and access management hub for a staggering number of users. As of early 2025, it supports approximately 722 million users worldwide, a testament to its scale and reliability.
The Identity and Access Management (IAM) market is highly competitive, yet Microsoft's position is undeniably dominant. This table illustrates how Azure AD and its related services stack up against other major players.
Comparing Leading Identity and Access Management Solutions
| IAM Solution | Market Share (%) |
|---|---|
| Microsoft (Azure AD, etc.) | 26.5 |
| Okta | 8.7 |
| Ping Identity | 4.1 |
| IBM | 3.5 |
| Oracle | 3.2 |
| Other | 54.0 |
This data highlights just how integral Microsoft's identity solutions are to the modern IT infrastructure. Choosing to integrate with Azure AD means aligning your application with the market leader.
Built for the Modern Enterprise
With over 85–95% of Fortune 500 companies relying on Azure services, it's clear that Azure AD is a de facto standard. When you implement Azure Active Directory integration, you're not just adding a feature. You're aligning your product with the default identity system for countless businesses in retail, healthcare, government, and beyond.
This alignment makes your application instantly more appealing to enterprise customers, who are always looking for solutions that are secure, manageable, and fit neatly into their existing tech stack. You can explore more statistics about Azure's global footprint on platforms like turbo360.com.
2. Before You Code: Getting Your App Ready in Azure AD
A solid Azure Active Directory integration doesn't start with code. It starts with preparation. I’ve seen too many projects stumble because of a rushed setup, leading to frustrating authentication errors that are a real headache to debug later. Think of this as laying the foundation; get it right, and the rest of the build goes much smoother.
It all begins with registering your application inside your Azure AD tenant. This isn't just a bit of admin work; it's how you establish a formal identity and trust relationship with the Microsoft identity platform. Once you register your app, Azure gives you an Application (client) ID. This unique ID is what your code will use to introduce itself whenever it asks for security tokens.
This flowchart lays out the essential sequence you'll follow inside Azure.
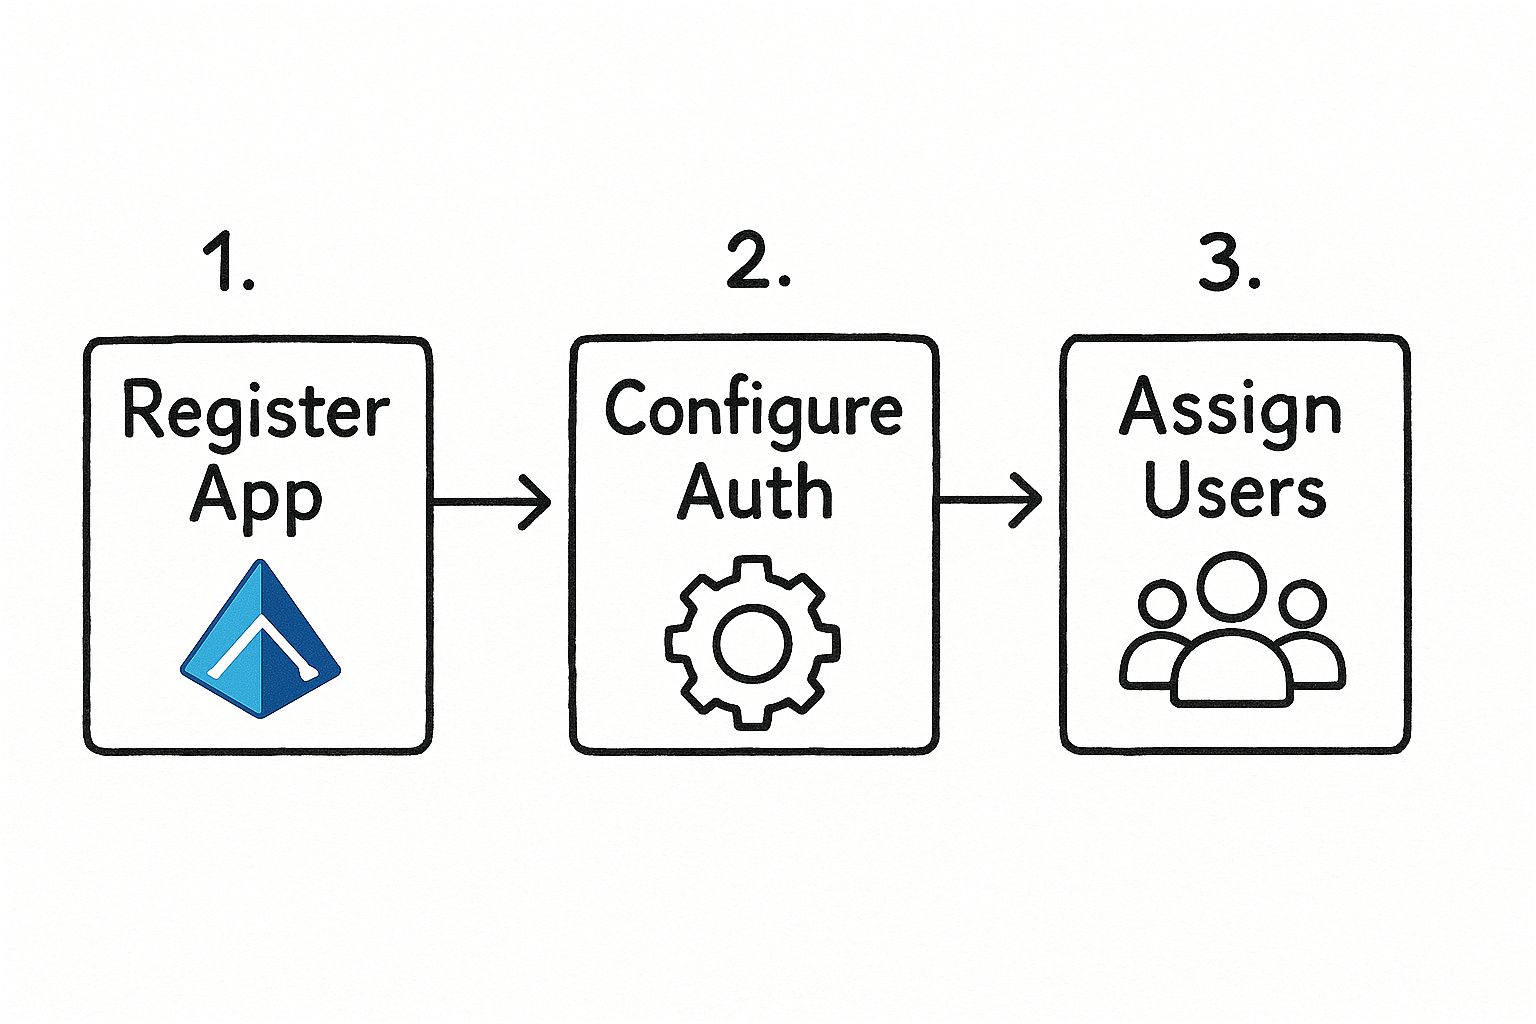
This "Register, Configure, and Assign" loop is the core of the process. It's the standard workflow I use for any app I'm connecting to Azure AD, and it ensures everything is secure and manageable from the get-go.
Diving into Your App Registration Settings
After registering the app, your next stop is the "Authentication" blade in the Azure portal. This is where you tell Azure AD exactly how your application will communicate with it.
One of the most critical settings here is the Redirect URI. This is essentially a whitelist of approved addresses. After a user authenticates, the Microsoft identity platform will only send the security tokens to a URI on this list. If your app’s sign-in request specifies a location that isn't registered, the whole process fails. It's a fundamental security check to stop tokens from being hijacked and sent somewhere malicious.
I always think of the Redirect URI as a P.O. Box for security tokens. You wouldn't want a sensitive package delivered to an unknown address. By pre-registering the URI, you're telling Azure, "Only deliver my tokens to this specific, trusted location."
Who Can Sign In? Defining Account Types
You also need to make a key decision about who can use your application by setting the supported account types. Your choice here really depends on your audience.
- Single tenant: The go-to for internal line-of-business apps. Only users in your organization's Azure AD tenant can sign in.
- Multi-tenant: A must-have if you're building a SaaS product. This allows users from any organization with an Azure AD tenant to use your app.
- Personal Microsoft accounts: Opens up your app to the public, allowing anyone with an Outlook.com, Xbox, or other personal Microsoft account to log in.
If you’re building a multi-tenant or public-facing app, you’ll need a place to host it. You can learn more about what Azure App Service is and see how it’s designed for exactly these kinds of deployments.
Finally, you need to create your application's "password"—either a client secret or a certificate. Your application uses this credential to prove its identity when it’s operating on its own, like when a web app needs to swap an authorization code for an access token.
Handle these credentials with extreme care. Never, ever check them into source control or leave them in a config file. The best practice is to store them securely in a service like Azure Key Vault. Getting this foundational setup right is non-negotiable for a secure Azure Active Directory integration.
Putting MSAL to Work: Implementing User Sign-In

Alright, you’ve done the prep work in the Azure portal. Now for the fun part: making the sign-in experience actually happen in your application. This is where the Microsoft Authentication Library (MSAL) becomes your best friend.
Think of MSAL as a specialist that handles all the heavy lifting of modern authentication protocols like OAuth 2.0 and OpenID Connect. It abstracts away the low-level, complex details so you don't have to manually build authentication requests or parse security tokens. Honestly, it’s a lifesaver. It lets you focus on your app's core features while dramatically reducing both boilerplate code and the risk of security missteps.
Knowing how to handle Azure Active Directory integration is a seriously valuable skill. Microsoft’s identity solutions are dominant in the enterprise world. In 2025, market data from 6sense.com shows that Azure Active Directory alone captures roughly 21.42% of the Identity and Access Management (IAM) market. When you add in Microsoft's other identity services, their total share climbs to nearly 50%. This is exactly why getting this integration right is a key skill for any developer working in the Microsoft ecosystem.
Initializing the MSAL Client
First things first, you need to initialize the MSAL client in your code. This object is the central nervous system of your app's authentication logic. No matter what language you're using—be it .NET, Node.js, Python, or something else—the setup is conceptually the same. You'll feed it the configuration details you noted down from the Azure portal.
You'll need these specific pieces of information:
- Client ID: The unique Application (client) ID from your app registration.
- Authority: The URL that points MSAL to the correct Azure AD endpoint. This URL changes based on whether your app is single-tenant, multi-tenant, or supports personal Microsoft accounts.
- Client Secret or Certificate: If you're building a confidential client (like a back-end web app), this is the credential you created earlier to prove your application's identity.
Once you have this client object initialized, it becomes your primary tool for interacting with the Microsoft identity platform.
Kicking Off the Sign-In Flow
With your MSAL client configured and ready to go, adding the actual sign-in functionality is surprisingly simple. You'll typically call a method like acquireTokenRedirect() or acquireTokenPopup(). This single function call handles all the work of building the proper authentication request and sending your user over to the official Microsoft sign-in page.
This is where the magic happens. Your app hands off the authentication process entirely to Azure AD. At no point does your application ever see the user's password. It only receives the result: a secure ID token after a successful login. This separation is a fundamental principle of modern, secure authentication.
After the user proves their identity, Azure AD sends them back to the Redirect URI you specified in your app registration. But this time, the request has an ID token attached. MSAL automatically intercepts this response, validates the token to ensure it’s legitimate, and then securely stores it in a cache. This token cache is what allows you to maintain the user's session without making them log in over and over again.
Handling Sign-Out Correctly
Signing users in is only half the battle; signing them out properly is just as crucial for security. A robust sign-out process cleans up the user's session data everywhere—both within your application and on Azure AD's side. Just clearing local cookies won't cut it.
A complete sign-out is a two-step dance:
- Clear Local Session: Your app must first wipe its own session state, which includes clearing any tokens from the MSAL cache. MSAL provides simple methods to do this.
- Redirect to Azure AD Logout Endpoint: Next, you redirect the user to a specific end-session endpoint at Azure AD. This action formally invalidates their session with Microsoft, ensuring they are truly logged out.
This two-step process is non-negotiable for preventing session hijacking and giving users a secure, complete sign-out. For a more detailed walkthrough with code examples, check out our guide on how to implement sign-in with the Microsoft identity platform.
Securing Your APIs Beyond the Login
Getting a user successfully signed in is a great first step, but the job of securing your application is far from over. Authentication confirms who someone is, but the real work happens with authorization, which dictates what they’re allowed to do. This distinction is absolutely critical for building a secure backend. For any real-world Azure Active Directory integration, protecting your API endpoints is just as crucial as handling the initial login.
I like to think of it like this: authentication is the bouncer checking IDs at the club's front door. Once you're inside, authorization acts as the set of keys that determines which VIP rooms you can actually enter. Your backend API needs to be that vigilant key master, checking permissions for every single request it receives.
Defining Permissions with Scopes
This whole process really begins back in the Azure portal, specifically within your API's app registration. This is where you'll define custom permissions, which in the OAuth 2.0 world are called scopes. A scope is just a granular permission that your API advertises to client applications.
For instance, rather than creating a single, overly permissive "access_everything" permission, you'd want to break it down. You could define much more specific scopes like:
Files.Read: Allows a client application to read files on the user's behalf.Files.Write: Lets the client app create or modify those files.Reports.Generate: Gives the app permission to kick off a report generation process.
By creating these specific scopes, you're essentially building a menu of permissions that client apps can request. This is the foundation of a least-privilege security model, which ensures that an application only asks for—and gets—the exact access it needs to function, and nothing more.
Requesting and Validating the Access Token
Once your API has its scopes defined, your client-side application can then request an access token from Azure AD that is specifically "minted" for your API. During the login flow, the client asks the user to consent to the permissions it requires (e.g., "This app wants to read your files"). Assuming the user agrees, Azure AD issues an access token that contains these approved scopes as claims.
Now, your backend API will receive this access token in the Authorization header with every request it gets from the client. And here comes the most important part of the entire process: validation.
You must treat every incoming access token as untrusted until you've rigorously proven it's valid. The entire security of your API hinges on this strict validation process for every single call. This isn't a one-time check; it's a constant state of vigilance that underpins a modern zero-trust architecture.
The validation isn't a single step but a series of critical checks:
- Signature: First, you verify the token was actually signed by Azure AD using its public key. This proves the token is authentic and hasn't been tampered with in transit.
- Issuer: Next, check that the
iss(issuer) claim inside the token matches the Azure AD tenant you expect and trust. - Audience: Finally, ensure the
aud(audience) claim matches your API’s unique Application ID. This is vital because it confirms the token was created specifically for your API and not some other service.
After confirming the token's authenticity, you can finally inspect its claims to make your authorization decisions. You'll look at the scp (scope) or roles claims to see what permissions the token actually grants. If a request comes in to write a file but the token only contains the Files.Read scope, you should immediately reject the request with a 403 Forbidden status code.
Thinking about more complex, event-driven systems, it's also important to understand how to secure the communication channels themselves. If that's on your radar, you might find our guide on what Azure Service Bus is and its role in a secure system helpful.
2. Hardening Your Azure AD Integration
Getting your application to talk to Azure Active Directory is a great first step. But making that connection resilient and secure is what really matters for the long haul. Now it's time to move past the basics and adopt practices that will protect your application and its users from real-world threats.
This isn't just about ticking a box. The stakes are incredibly high. Cybersecurity experts, like those at the Australian Signals Directorate, have pointed out that weaknesses in Active Directory are a common thread in major ransomware events. In fact, these vulnerabilities played a role in nearly every significant incident they analyzed. You can get a sense of the threat landscape from this breakdown of top Azure AD attacks.
Let's dive into the practical steps you can take to fortify your integration.
Start with the Principle of Least Privilege
If you take only one thing away from this section, let it be this: always enforce the principle of least privilege. It's the golden rule of identity security.
When you're configuring API permissions for your app, be stingy. Only grant the absolute minimum access required for your application to do its job. For example, if your app just needs to read the profile of the person signing in, don't grant a sweeping permission like user.read.all. Use the most restrictive scope that works.
This one habit acts as your most effective first line of defense. Should your application ever be compromised, this principle dramatically shrinks the blast radius, limiting what an attacker can do.
Put Conditional Access to Work
This is where you can add some serious, intelligent automation to your security. Think of Conditional Access policies in Azure AD as smart bouncers at the door of your application. They check everyone who tries to sign in and enforce specific rules based on the situation.
With Conditional Access, you can implement some truly powerful security measures. I’ve seen them stop attacks in their tracks. Here are a few must-haves:
- Enforce Multi-Factor Authentication (MFA): This is non-negotiable. Require a second verification factor for users, especially if they’re coming from a network you don’t recognize or manage.
- Require Compliant Devices: You can lock down access to only those devices that are managed by your organization and meet your security benchmarks.
- Block Risky Sign-ins: Let Azure AD's Identity Protection do the heavy lifting by automatically blocking sign-in attempts it flags as high-risk.
Think of Conditional Access as a set of dynamic "if-then" rules for your app's security. If a user tries to access sensitive data from an unmanaged device, then block them. If they sign in from a new country, then challenge them with MFA. This level of control is a game-changer.
Maintain Essential Security Hygiene
Finally, a few security practices are so fundamental they should be part of your team's DNA. These aren't one-and-done tasks; they are ongoing responsibilities.
First, get your application secrets out of your config files. I can't stress this enough. Storing secrets in code or configuration is a recipe for disaster. Instead, use a dedicated secret store like Azure Key Vault. This allows your application to fetch credentials securely at runtime, keeping them out of your source control and deployment packages.
Second, make a habit of keeping your Microsoft Authentication Library (MSAL) packages up to date. Microsoft is constantly patching these libraries to fix newly discovered security holes. Running on an old version is like leaving your front door wide open to known exploits. Don't make it easy for attackers.
Answering Common Questions About Azure AD Integration
Even with the best plan in hand, you're bound to run into a few head-scratchers when integrating Azure Active Directory. I've seen these same issues trip up developers time and time again. Let's walk through some of the most common questions so you can avoid these classic pitfalls.
What Do I Do When an Access Token Expires?
One of the first real-world problems you'll face is handling expired access tokens. It’s a jarring experience for a user when an app suddenly logs them out or throws an error just because a token expired. This is where proper token management becomes critical.
Your application should be built to handle this gracefully. The Microsoft Authentication Library (MSAL) is designed to manage this entire lifecycle for you behind the scenes. When your API sends back a 401 Unauthorized response, it's your cue that the access token is no good. Instead of forcing a re-login, your code should call MSAL's acquireTokenSilent() method. This nifty function will automatically use its cached refresh token to get a new access token from Azure AD, all without the user ever noticing a thing.
Should I Build a Single-Tenant or Multi-Tenant App?
This is a fundamental architectural decision that dictates who can sign into your application. Getting this wrong early on can lead to some serious headaches down the road.
-
Single-Tenant: Think of this as a "members-only" club. It's perfect for internal, line-of-business (LOB) applications where access is strictly limited to users in your own organization's Azure AD directory. It's simpler and more secure for internal tools.
-
Multi-Tenant: This is the way to go if you're building a Software-as-a-Service (SaaS) product for the public. It opens your doors to users from any organization with an Azure AD account, giving you a much wider audience.
From my experience, a frequent misstep is defaulting to a single-tenant setup for an app that you think will only be used internally. If there's even a small chance it could become a commercial SaaS product later, plan for multi-tenancy from day one. Migrating from single to multi-tenant is a complex undertaking that requires a lot of refactoring.
Why Am I Getting a Redirect URI Mismatch Error?
Ah, the infamous AADSTS50011 error. Seeing this is practically a rite of passage for anyone working with Azure AD. This error simply means that the "reply URL" your application sent in its authentication request doesn't perfectly match one of the Redirect URIs you've configured in the Azure portal.
When you see this, meticulously check your registered URIs in Azure against the one in your application's configuration. The culprit is almost always a tiny, easy-to-miss detail:
- A simple typo in the URL.
- An
httpvs.httpsmismatch. - A missing or extra trailing slash (
/).
Getting a handle on these concepts is essential if you're aiming to pass the AZ-204 exam. At AZ-204 Fast, we've built an entire study system—from interactive flashcards and practice exams to detailed cheat sheets—all designed to help you study smarter.
Ready to fast-track your certification? Check out the AZ-204 Fast platform and start your journey today.